Essential Kegerator Coupler Parts for Your Home Brew Setup
Ever wondered why your draft beer sometimes pours foamy or flat? Those issues often trace back to the little parts that bridge your keg and tap. Without the right setup, even the best brew can lose its crisp taste and perfect carbonation.
Installation Parts Supply understands that flawless pours begin with reliable components. From homebrewers to casual draft-beer fans, getting to know these keg tap diagram parts guarantees the perfect pour.
Whether it’s a washer or a length of gas tubing, each piece helps preserve carbonation and flavor. Upwards of 90% of pouring problems are due to incompatible or damaged parts. With a bit of know-how, you can keep your setup working without a hitch.
Central Ideas
- Proper coupler selection ensures optimal beer flow and flavor.
- Installation Parts Supply offers dependable draft-system hardware.
- Regular maintenance prevents common pouring problems.
- Different beer types may require specific coupler styles.
- Coupler faults are behind most draft system breakdowns.
Kegerator Coupler: An Overview
A flawless draft begins with the proper keg-to-tap link. A keg coupler bridges your CO₂ cylinder or nitrogen tank to the beer line, using compressed gas to push liquid smoothly to your taps. Think of it as the engine of your draft beer system—without it, nothing flows.
This small device has two jobs: it delivers gas to pressurize the keg and controls beer output. Its interior consists of a probe, a check valve, and distinct ports for beer and gas. Each part ensures your brew stays carbonated and pours without foam.
| Part | Function | Frequent Problems |
|---|---|---|
| Probe | Pierces the keg’s cap | Misalignment causes leaks |
| Check Valve | Stops beer from flowing backward | Worn valves lead to flat beer |
| Gas/Liquid Ports | Links to tubing | Loose fittings create foam |
Attaching the coupler wrong is a rookie mistake—75% of first-time users do it. The result? Foamy messes, leaks, or worse, spoiled beer. Check Installation Parts Supply’s charts and videos for correct setup.
Even “universal” styles need to correspond with your keg’s standards. A mismatched setup won’t just ruin your pour; it could damage your equipment.
Keg Coupler Varieties and Applications
Different beers call for different couplers. Using the proper coupler keeps your beer fizzy and flavorful. Here’s how to pick the perfect fit.
Standard D System Coupler
It’s used by roughly 85% of U.S. craft breweries. The one-valve mechanism snaps firmly into place. Quick hint: Find the “Sankey” imprint on it.
U System Coupler
The harp emblem identifies it for nitrogen blends like Guinness. It uses a unique gas blend (75% nitrogen) to create that creamy head. Don’t jam a U-style onto a regular keg—no proper seal results.
S System (European Sankey) Coupler
Heineken and other European imports need this reverse-thread version. The left-hand twist prevents mix-ups with D Systems. Trivia: It stands a bit taller than the North American model.
A-, G-, and M-Type Couplers
German and UK beers demand specialized connectors:
- A System: Slides onto Warsteiner or Paulaner kegs. The “slider” mechanism is foolproof.
- G-Type Coupler: Fits Bass and Boddingtons with its tri-flat stem. Britain’s go-to pub coupler.
- M-Type Coupler: Locks onto Schneider Weisse kegs. The slide-lock clicks when secure.
Installation Parts Supply color-codes their compatibility guides—green for D, black for U, blue for S. A Midwest microbrewery saved $3,000 yearly by switching to correct couplers. Remember: True compatibility beats “universal” claims every time.
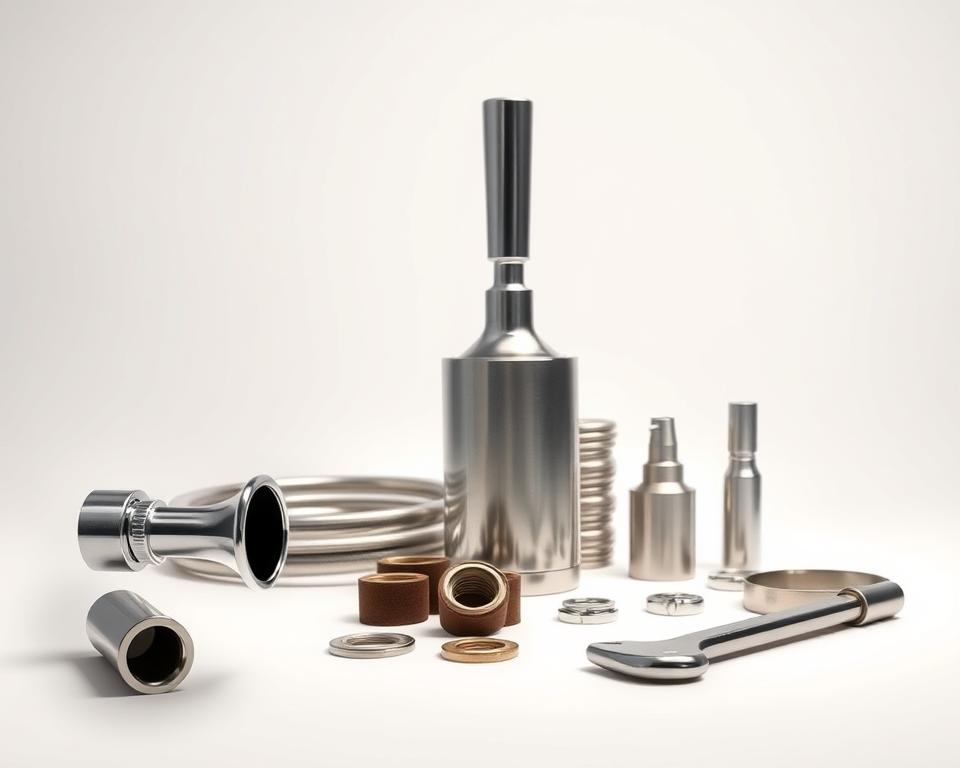
Coupler Parts Breakdown
Behind every smooth pour lies a set of precision-engineered components. These small but mighty pieces ensure your beer stays carbonated and flows flawlessly. Let’s break down the key hardware that keeps your system running.
Coupler Probe & Check Valve
The stainless steel probe pierces the keg’s seal, controlling beer flow. High-end probes outlast budget ones by threefold. Below it, the check valve blocks backflow—Installation Parts Supply’s most-replaced part.
Coupler Hex Nut & Washers
Your seal depends on that hex nut. Brass is economical; stainless fights rust. Use nitrile washers in the cold—EPDM fails below 40°F.
| Component | Construction | Advantage |
|---|---|---|
| Probe | Stainless Steel | Resists wear |
| Check Valve | Food-grade plastic | Prevents flat beer |
| Hex Nut | Brass/Stainless | Balances cost/durability |
Gas & Beer Ports
Your gas port should see 20–30 PSI pressure. Mismatched pressure causes foam. Liquid ports work best with 3/16″ ID tubing—1/4″ lines increase turbulence. FDA-sealed rebuild kits make upkeep easy.
Pro Tip: Change seals twice a year or per 50 kegs. A few dollars in washers beats hundreds in repairs.
How to Set Up Your Kegerator Coupler
Install correctly for flawless drafts. Proper installation prevents foam, leaks, and flat beer. Use this step-by-step for a seamless install.
Attaching Coupler to Keg
Open the handle, fit lugs into place. Rotate until secure but don’t overtighten. Choose low-profile to gain 4–5″ clearance.
Our wrench sets hex nuts to the ideal 8-10 ft-lb. Most leaks—about 80%—come from probe misalignment. Always use fresh washers to maintain pressure.
Hooking Up Your Gas & Beer Lines
Use 5/16″ MFL fittings to attach the gas line. Seal threads to stop CO₂ from escaping. Keep beer tubing 10-12′ of 3/16″ ID for best flow.
| Step | Tool | Tip |
|---|---|---|
| CO₂ Line | Thread sealant | Check with 30 PSI leak test |
| Beer Line | Pipe cutter | Keep ends square for seals |
| Leak Test | Soapy water | Check for 24 hours |
Modern rigs offer app-based pressure feedback. Our quick-connects helped a Denver bar slash foam by forty percent. Always shut off CO₂ if major leaks occur.
Common Coupler Problems & Fixes
Nothing ruins a cold beer faster than foam spraying everywhere. Most pouring problems stem from simple fixes once you know where to look. Let’s tackle the frequent headaches and their solutions.
Foamy Beer Solutions
Foam is blamed in nearly 70% of draft problems. First, confirm the beer is at 38°F, which is optimal for ales. If it’s too warm, carbonation goes off too quickly.
Check each draft line connection next. Soap test any fitting—bubbles point to leaks. Snug fittings carefully; overtightening can harm seals.
- Check ball failure causes intermittent flow—listen for hissing sounds
- Pressure imbalance? Compare your gauge to this chart:
| Beer Type | CO₂ PSI | N₂ Ratio |
|---|---|---|
| Lagers | 10–12 | N/A |
| Stouts | 25–30 | 75% nitrogen |
Coupler Fit Problems
Loose couplers almost always trace back to worn seals. Our data shows O-ring swaps resolve 40% of loose fits. If the face is warped, swap the entire coupler.
Shims can stabilize wobbly connections. These inexpensive plastic wedges stabilize wobbling connections. Choose low-profile for compact spaces.
Pro Tip: An emergency kit with five washers fixes most sudden leaks. Staff who learned these tips reduced waste by nearly 20% in Chicago.
Tank icing means you need to ease off the gas. Defrost before tweaking the relief valve. Digital gauges need yearly calibration for accuracy.
Coupler Cleaning & Care
Hygienic systems yield the best flavor. Leftover yeast and oils harm both taste and pouring. Regular care preserves performance.
Coupler Teardown
First, disassemble the coupler. Remove the handle, probe, and check valve. Soak all parts in warm water with 1 oz of PBW per gallon for 15–20 minutes. This removes yeast and hop oils.
Our brushes get into the smallest crevices. Focus on the ball valve—gunk loves to hide there. Rinse thoroughly to avoid soapy aftertastes.
Best Coupler Cleaners
PBW leads the pack for balanced cleaning. Acids clean quick but may degrade seals. For commercial setups, ultrasonic systems blast away debris with sound waves.
- Air Drying: Use compressed air or microfiber cloths.
- Sanitizing: Follow FDA CFR 117 guidelines—30 seconds of contact time kills bacteria.
- Logs: Use a log sheet to record each cleaning.
UV sanitation guards seals longer. Rinse waste per regulations—PBW can damage plumbing. A little effort ensures quality pours and extends your system’s life.
In Closing
Savor every pour once you’ve perfected your draft setup. Correct parts, clean routine, and proper install equals perfect pints. Count on Installation Parts Supply for ongoing support and rebuild-kit deals.
Regular upkeep can stretch your hardware lifespan by seven years. Get their checklist and attend a brewmaster session for insider advice. An annual check-up guarantees smooth service—just listen to customers with five years of trouble-free use.
Ready to upgrade? Visit Installation Parts Supply today and raise your home bar game.